You’ve made it to Part 3 of the Spring Cellar Sweater Crochet Along! By now, your sweater is really starting to take shape, and it’s so exciting to see it all come together. In this section, we’ll keep building on that comfy, breezy vibe with clear instructions and a video tutorial to guide you every step of the way! It’s time to keep the momentum going – let’s do some seaming, and add the neckline and hem!
Disclaimer: This post includes affiliate links; materials provided by Yarnspirations and Furls Crochet.
Prefer an ad-free PDF? This will be updated in your Ravelry library throughout the CAL!
Prefer the free blog version? Keep scrolling!
Presented as the May 2025 Crochet Along
Is it just me, or is 2025 shaping up to be the year of the stitch along? It feels like we’re all leaning into creativity and community more than ever. That’s why we’re keeping this CAL relaxed, supportive, and fun! The Spring Cellar Sweater has been professionally tech edited, and I’m walking you through each part with easy-to-follow video tutorials. And if you’re joining us after the CAL is complete—bonus! You can jump straight into the full pattern at your own pace. Just follow the links below to get started!
Here is the 2025 Spring Cellar Sweater Crochet Along Schedule:
May 2 – Spring Cellar Sweater Part 1
May 7 – Spring Cellar Sweater Part 1 Video Tutorials
May 9 – Spring Cellar Sweater Part 2
May 13 – Spring Cellar Sweater Part 2 Video Tutorials
May 16 – THIS POST – Spring Cellar Sweater Part 3
May 21 – Spring Cellar Sweater Part 3 Video Tutorials
May 23 – Spring Cellar Sweater Part 4
May 30 – Spring Cellar Sweater Part 4 Video Tutorials

Made in Bernat Softee Cotton, or Your Favorite DK Weight Yarn
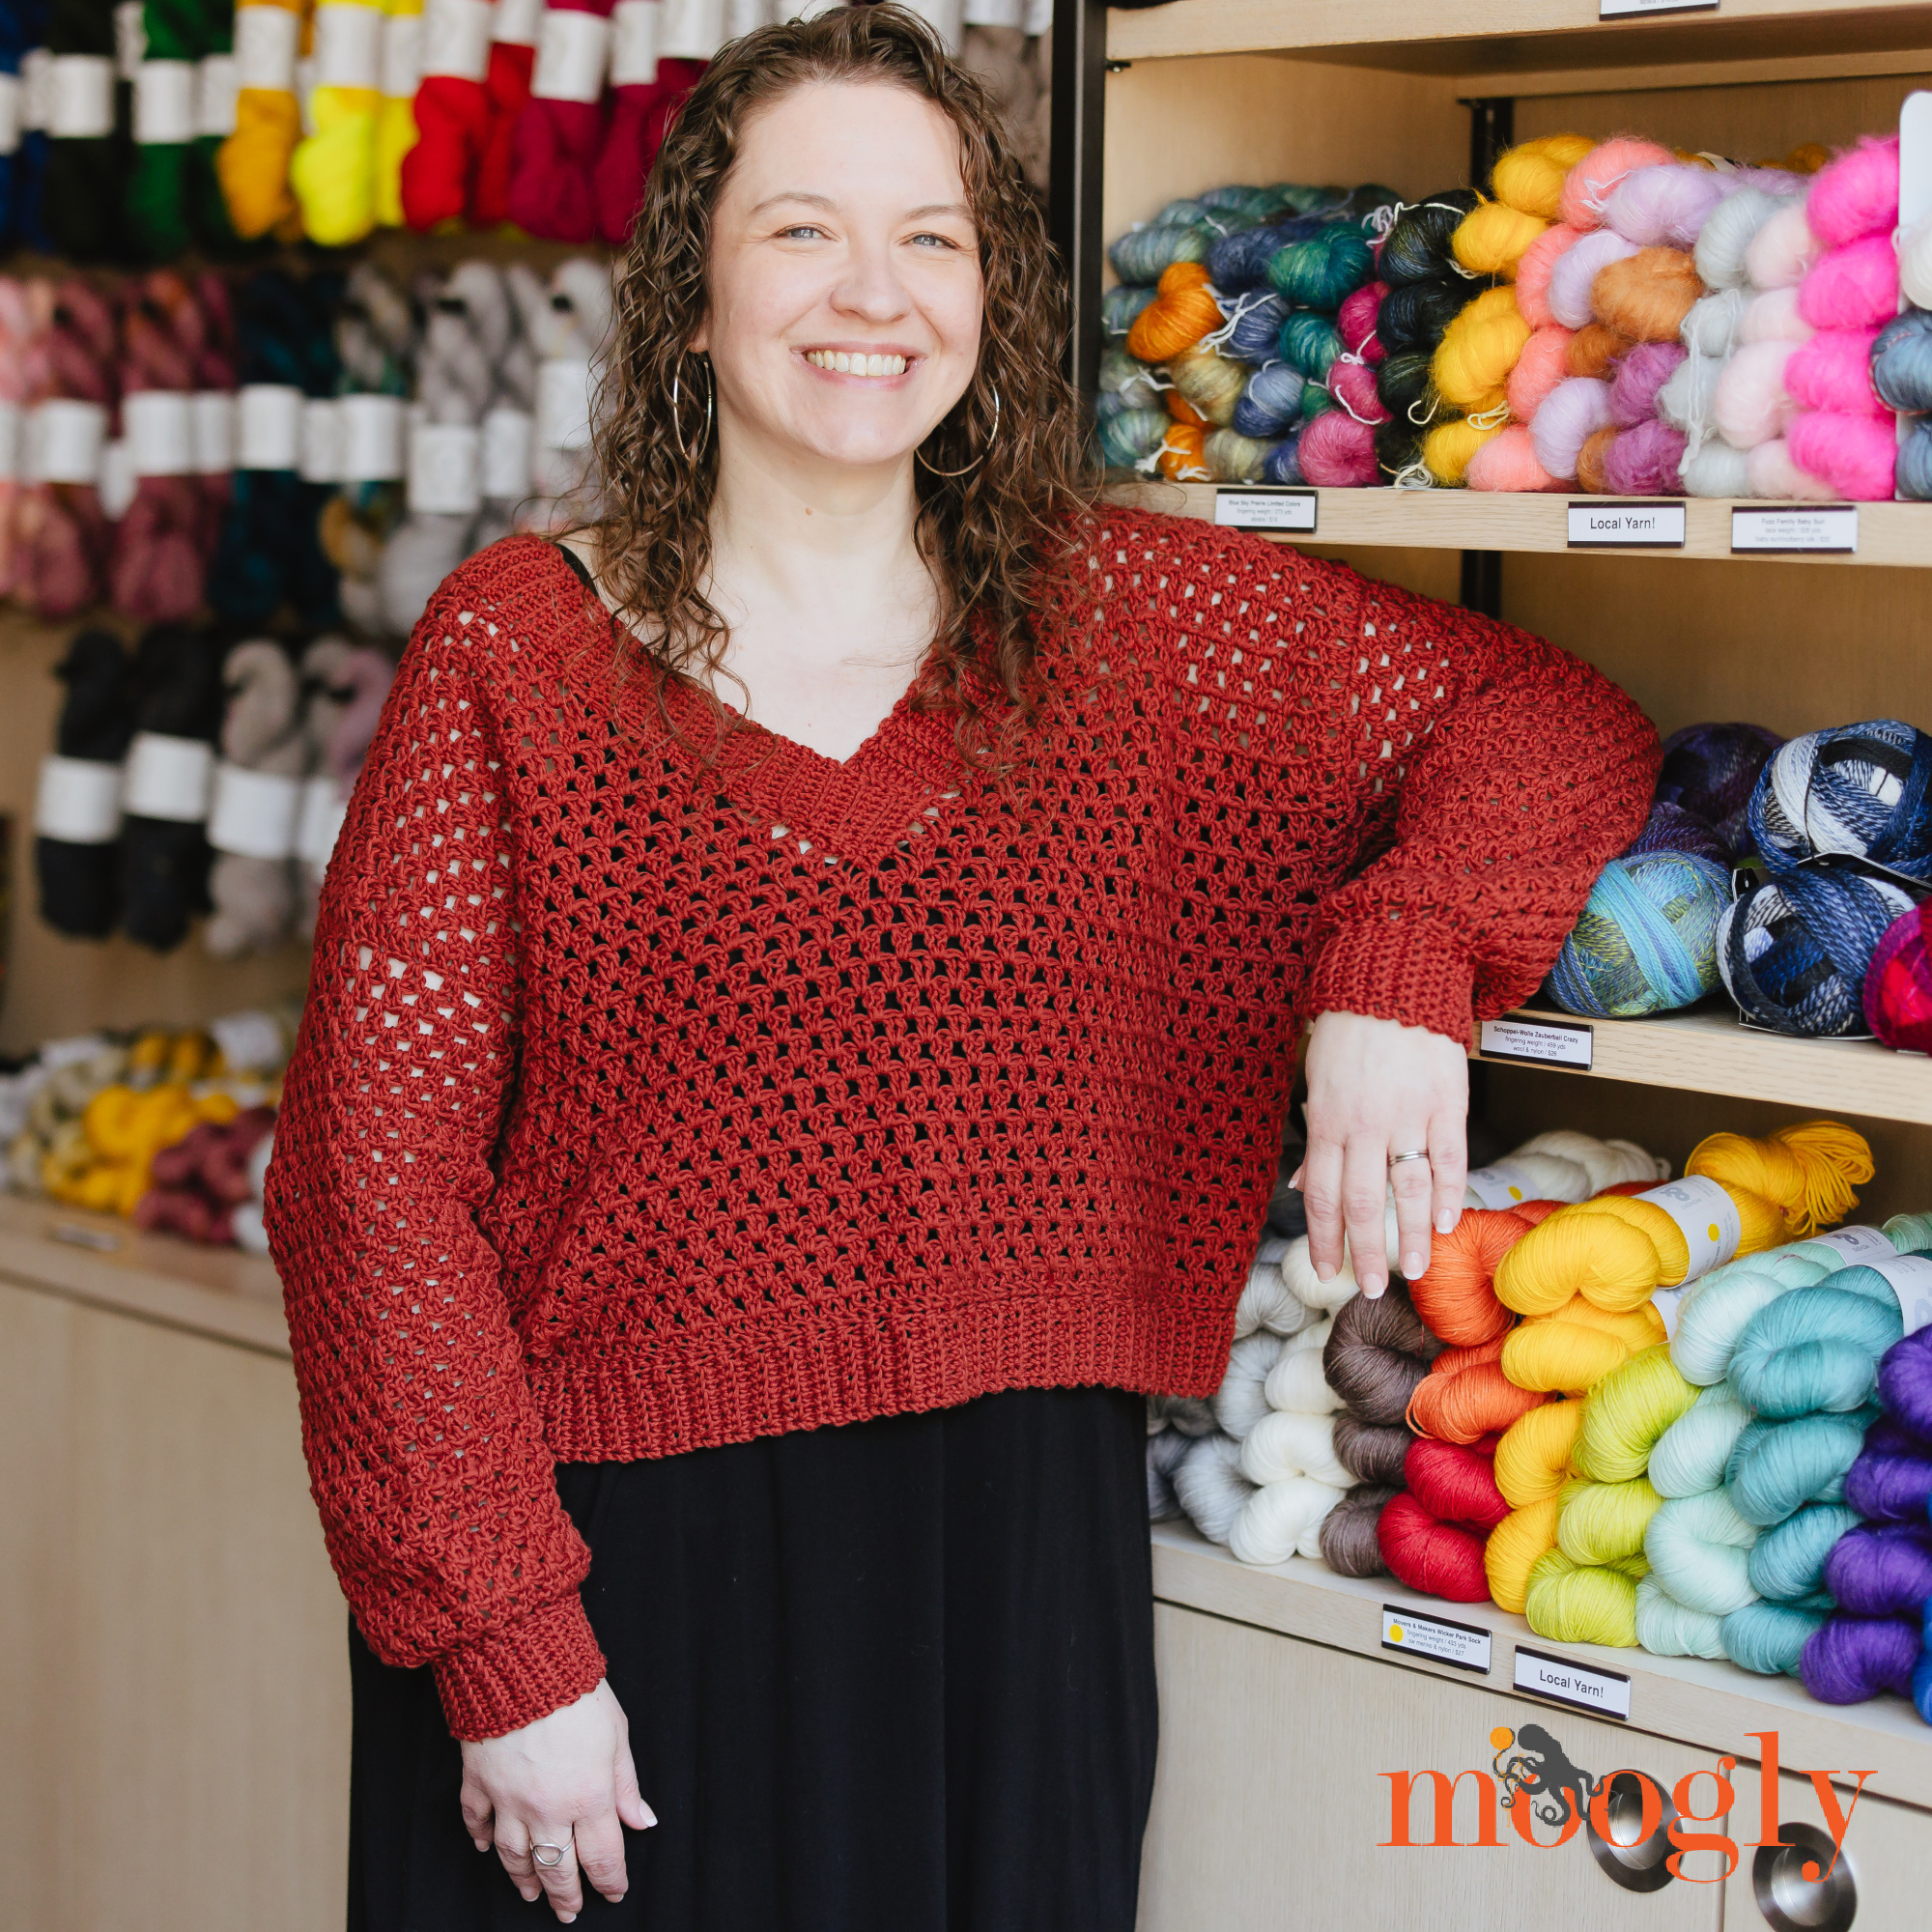
The Spring Cellar Sweater is designed to be a go-to topper – one that fits with and over whatever else you’re wearing. You can pair it with everything from a maxi dress to jeans, and the oversize fit will guarantee style and comfort! I’ve included all the measurements in the Schematic below, so you can choose the perfect size for you.

To stitch this pullover, I used Bernat Softee Cotton in a warm red – and I’m thinking I need to make another! This is a 3/Light or DK weight yarn with a majority cotton content, making it perfect for year- round wear. The simple stitch pattern means is works up fast, with minimal concentration needed.
Whether you’re riding out a storm, settling in for a movie marathon, or packing a project for a weekend away, the Spring Cellar Sweater is the perfect companion. Light, comfy, and super beginner-friendly, it’s a great first garment, or just a chill, satisfying make for any crocheter looking to relax with their hook.

Spring Cellar Sweater
Add this pattern to your Ravelry Queue and Favorites
US-I, 5.5mm hook, Furls
1150 (1250, 1550, 1750) yds Bernat Softee Cotton (3/Light; 60% cotton, 40% acrylic; 120g / 4.2 oz, 232 m/ 254 yds) – (5 (5, 7, 7) balls
Colorway Shown: Warm Red
Gauge: 12 sts x 8 rows = 4”/10cm in main st pattern
Gauge Swatch Instructions: Work 16 FDC, then work Rows 2-12 of Back Body. Measure gauge in center of swatch, avoiding edges.
Sizes:
Small/Medium (Large/XL; 2X/3X; 4X/5X)
Sizing is based on the Craft Yarn Council Standards, size L/XL shown)

Schematic measurements (in inches)
A – Chest Circumference: 41.25 (49.25, 57.25, 65.25)
B – Cross Back (Shoulder to Shoulder): 18 (22, 26, 30)
C – Shoulder Width: 4.75 (6, 7.25, 9.25)
D – Back Neck Width: 8.75 (10, 11.25, 11.25)
E – Sleeve Length (including Cuff Ribbing): 21.25 (19.25, 20.25, 17.75)
F – Sleeve Circumference: 12.75 (14, 15.25, 16.75)
G – Armhole Depth: 8.5 (9.5, 10.5, 11.5)
H – Hem to Armhole Length (including Hem Ribbing): 8 (8, 9, 9)
I – Total Length (including Hem Ribbing): 19.25 (20.25, 22.25, 23.25)
HELPFUL LINKS AND TUTORIALS
Spring Cellar Sweater Part 3 Tutorial – COMING May 21
Crochet Abbreviations
Back Loop Only –BLO
Foundation Double Crochet – FDC
Mattress Stitch Seaming
Standing Double Crochet Join – STDC
Standing Single Crochet Join – STSC
Special Stitch:
Slip Stitch 2 Together – slst2tog: insert hook in next st, yo and pull up a loop (2 loops on hook), insert hook in next st, yo and pull up a loop, pull this loop through the other 2 loops on the hook.
NOTES:
If you prefer not to use Foundation Stitches, you can begin with a chain that you dc into for the first row. Make 2 chs more than the desired first row stitch count, then start the first row with a dc in the 4th chain from the hook. The 3 skipped chs will count as the first dc of the row.
If you prefer not to use the CSDC stitch, you can substitute a ch 3 (counts as first dc).
When instructed to work between stitches, you are not working into a stitch or into a chain space. Instead, insert your hook between the posts of the indicated stitches. The previous stitch is the one most recently skipped or worked into. The next stitch is the one you haven’t worked into or skipped yet.
The sleeves (not including the cuffs) are worked in turned rounds, so even-numbered rows will be worked from “inside” the sleeve. This is important to maintain the look of the stitches and to keep the joining seam under the arm straight.
Spring Cellar Sweater Part 3 Instructions
Sew Back and Front Together:
Hold Back and Front with RS together, matching up shoulder and side sts. Use stitch markers to pin in place. Using the mattress stitch (or your preferred seaming method), seam side edges of Body sections together from hem to armhole. Then, seam shoulders. Turn work RS out. (RS/WS are determined by personal preference.)
Ribbed Hem
NOTE: The length of this section can be adjusted for personal preference – Add/remove chains to the Setup Row for a longer/shorter waistband. As written, the band should be approximately 2.5” wide.
Setup/Row 1: With RS facing, join with a sl st in first st after either side seam, at bottom edge of Body, ch 9, skip sc in top 2 loops of 2nd ch from hook, sc in BLO of each rem ch, slst2tog in the next 2 unworked sts at the waist; turn. (8 sc)
Row 2: Skip slst2tog, sc in BLO of each st across until 1 st rem, sc in last st; turn.
Row 3: Ch 1, sc in first st, sc in blo of each rem st across, slst2tog in next 2 unworked sts on Body; turn.
Repeat Rows 2 and 3, working around entire bottom edge of Body, ending after a rep of Row 2.
Fasten off, leaving a long tail. Use tail to sew last row and first row of Ribbing together.
Neckline Ribbing
Row 1: With RS facing and working in sides of rows across front opening, STSC in 4th row of Left Front, sc in same row, 2 sc in each of next 3 rows, slst2tog in first 2 rows of Right Front, turn. (8 sc)
Row 2: Skip slst2tog, sc in BLO of each st across until 1 st rem, sc in last st; turn.
Row 3: Ch 1, sc in first st, sc in BLO of each rem st across, slst2tog in the next 2 unworked rows along opening , turn.
Repeat Rows 2 and 3, working around front opening and neckline, until the sides of all rows around neckline are worked, ending after a rep of Row 2, do not fasten off.
Next 8 Rows: Ch 1, sc in first st, sc in blo of next 6 sts, sc in the last st; turn. After 8th row, fasten off leaving long tail. Use tail to sew last row behind first row so that it fits into V of opening.

Coming Up Next:
May 21 – Spring Cellar Sweater Part 3 Video Tutorials
May 23 – Spring Cellar Sweater Part 4
Itchin’ for more Stitchin’?
Looking for your next project? Check out the Moogly Free Patterns Page or Ravelry!

If any Moogly pattern inspires you to make your own project, and you post a photo on social media, be sure to tag me @mooglyblog or #mooglyblog so I can check it out too!
The Fine Print
Follow Moogly on Facebook, Twitter, Pinterest, TikTok, Bluesky, and Instagram! Thank you to Yarnspirations and Furls for providing the materials shown in this post. Written pattern copyright Tamara Kelly 2025, all rights reserved. Please do not reprint or repost this pattern. Please do link to this page to share this pattern with others.
If you wish to make items for sale from this pattern or translate it to another language, please visit the About page for details.


