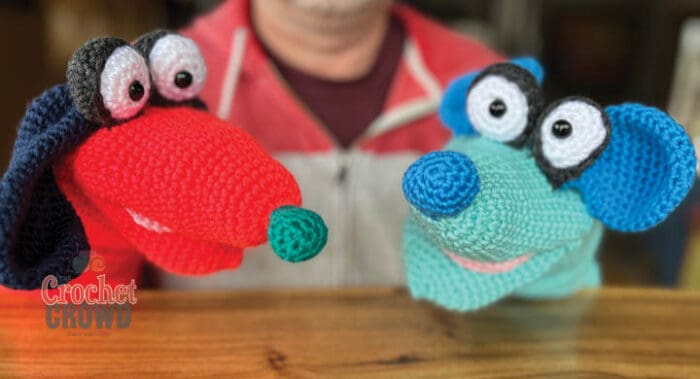
Yarnspirations asked me to develop a unique approach for something for them for the future. Daniel suggested we develop at least one puppet to be the antagonist or maybe the voice of reason. The idea of scrappy was born.
Daniel prefers to be behind the camera; Scrappy is the alter ego for Daniel. Daniel naturally has a cartoon voice with a bit of emphasis on mouth-play.
Daniel also suggested Scrappy have a friend that was also a dog. But you know how well I can design; my dog ended up being a mouse! I was joking with Daniel that I should do an alligator next to get an emu for a finished product! haha.
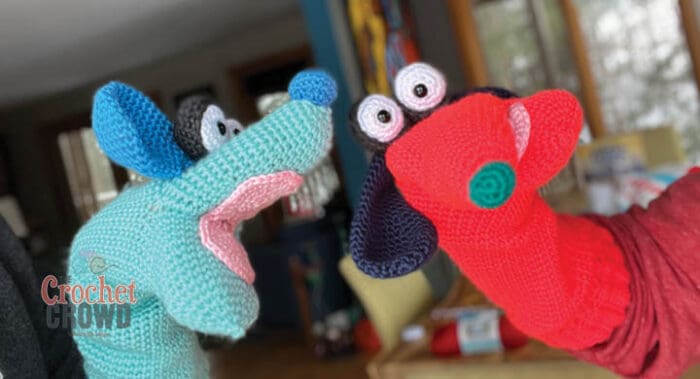
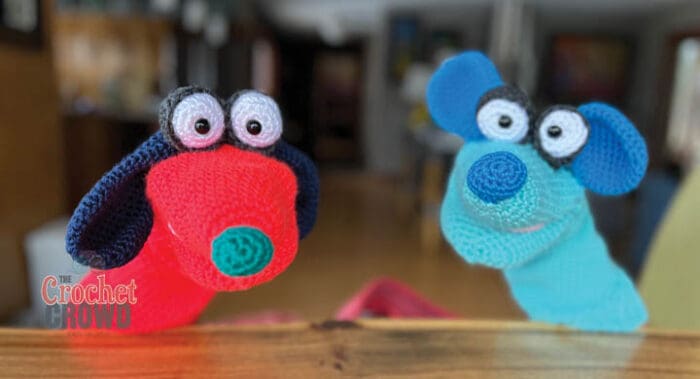
Introducing Scrappy the Dog and Nibbles the Mouse. These are designed for Daniel and I, which are adult arms, hands and wrists. I don’t have child-size versions of these characters.
Most of the yarn choices were discontinued using Caron Simply Soft, as the yarn line is vibrant in colouring. It’s how Scrappy got his name in the first place; I was using odd balls of yarn I already had. You will notice if you try to research some of the colours that don’t exist today.
Patches, the pink version, is from the video tutorial. Her colouring isn’t listed in the pattern. Her body colour was Soft Pink. Her ears and nose with Light Country Blue, and her eyelids were Iris.

We did a trial run with Scrappy and realized he needed a bit of definition inside the mouth. So that’s been added on since this trial run.
Daniel suggested I travel to Australia with Nibbles as my alter ego and send messages home to Scrappy. So if you see two men yapping at each other on Facebook with crochet puppets, it’s just for fun. I’m sure they will say knotty stuff too!
Caron Simple Soft 170.1 g/ 6 oz, 288 m/ 315 yds
Project Size: 17” Long without noses.
5 mm / H/8 Crochet Hook or size needed to obtain gauge.
GAUGE: 13 sc and 14 rows = 4” [10 cm]
Abbreviations
Approx = Approximately
Beg = Beginning
Ch = Chain(s)
Rem = Remaining
Rep = Repeat
Rnd(s) = Round(s)
RS = Right side
Sc = Single crochet
Scblo = Single crochet back loop only
Sl st = Slip stitch
Sk = Skip
Sp(s) = Space(s)
St(s) = Stitch(es)
WS = Wrong side
Supply List
Contrast A – 1 Ball, Neon Coral
Contrast B – Scrap Yarn, Cool Green
Contrast C – 1 Ball – Dark Country Blue
Contrast D – Scrap Yarn – Black
Contrast E – Scrap Yarn – White
Contrast F – 1 Ball – Cobalt Blue
Contrast G – 1 Ball – Robin’s Egg
Contrast H – 1 Ball – Soft Pink
2 – 10mm Safety Eyes
A bit of polyfil for the nose and eyes.
Tapestry Needle
Stitch Marker
Cuff
Use A for Scrappy the Dog or G for Nibbles the Mouse.
With colour above, ch 12.
1st row: (RS). 1 sc in 2nd ch from hook and each ch to end of chain. Turn. 11 sc.
2nd row: Ch 1. 1 scblo in each st to end of row. Turn.
Rep last row until work from beg measures 9” [23 cm], ending on a WS row. Turn.
To join cuff in rnd, fold the cuff so RS are together inside. Work in sl st across last row and rem loops of foundation ch tog. Do not fasten off.
Flip cuff, RS is facing out.
Body of Puppet
Work around side edge of cuff as follows:
1st rnd: Ch 1. Work 40 sc evenly around. DO NOT join with sl st to beg sc. Mark last st with stitch marker for reference. Working in continuous rounds from this point.
2nd rnd: 1 sc in each sc around. 40 sc.
Rep 2nd rnd until 5” [13 cm] from the beg of project with st marker from 1st rnd is directly below.
Next rnd: *1 sc in the 8 sts, sc2tog. Rep from * around. 36 sc.
Rep last round until 12” [30.5 cm] from the beg of project with st marker from 1st rnd is directly below.
Top Head
Next rnd: Sc in next 9 sts, ch 18, sk 18 sts, sc in next 9 sts. 36 sts.
Next rnd: Sc in each st and ch around. 36 sc.
Next rnd: Sc in each st around.
Rep last round until 13” [33 cm] from the beg of project with st marker from 1st rnd is directly below.
Next rnd: *Sc in next 4 sts, sc2tog. Rep from * around. 30 sc.
Next rnd: Sc in each st around.
Rep last round until 14” [35.5 cm] from the beg of project with st marker from 1st rnd is directly below.
Next rnd: *Sc in next 3 sts, sc2tog. Rep from * around. 24 sc.
Next rnd: Sc in each st around.
Rep last round until 16” [40.5 cm] from the beg of project with st marker from 1st rnd is directly below.
Next rnd: *Sc in next 2 sts, sc2tog. Rep from * around. 18 sc.
Next rnd: *Sc in next st, sc2tog. Rep from * around. 12 sc.
Next rnd: Sc2tog around. 6 sc.
Fasten off. Leave opening, as the nose will be sewn into the position where the opening is.

Mouth
Tip: All measurements for this should be done with the puppet lying on its back with the top of the head flat on its back.
1st rnd: With RS facing. With A, join with sl st and start in the middle of the head section with the notion you are starting at the middle of the underside of the top of the mouth. 1 sc in each stitch around the body and upper mouth section. 36 sts. Continuous round from this point.
2nd rnd: Sc in each st around.
Rep last round until 13” [33 cm] from the beg of project.
Next rnd: *Sc in next 4 sts, sc2tog. Rep from * around. 30 sc.
Next rnd: Sc in each st around.
Rep last round until 14” [35.5 cm] from the beg of project.
Next rnd: *Sc in next 3 sts, sc2tog. Rep from * around. 24 sc.
Next rnd: *Sc in next 2 sts, sc2tog. Rep from * around. 18 sc.
Next rnd: *Sc in next st, sc2tog. Rep from * around. 12 sc.
Next rnd: Sc2tog around. 6 sc.
Fasten off. Leave long tail to gather rem 6 sts and pull shut to close.
Place a bit of polyfil at the tip of the nose and the tip of the mouth loosely inside.
Nose
1st rnd: With B, create magic ring. 6 sc in magic ring. Mark last st with st marker. Work in continuous rnds from here.
2nd rnd: 2 sc in each st around. 12 sc. Move stitch marker at the end of each rnd to the last st.
3rd and 4th rnds: 1 sc in each st around. 12 sc.
5th rnd: Sc2tog around. Fasten off and leave long tail to sew.
Lightly stuff and sew to the end of the nose on the top head section.

Eyeball – Make 2
1st rnd: With E, create magic ring. 6 sc in magic ring. Mark last st with st marker. Work in continuous rnds from here.
2nd rnd: 2 sc in each st around. 12 sc. Move stitch marker at the end of each rnd to the last st.
3rd rnd: *1 sc in next st, 2 sc in next st. Rep from * around. 18 sc.
4th and 5th rnds: 1 sc in each st around. 18 sc.
Place safety eye directly in the middle of eye.
6th rnd: *1 sc in next st, sc2tog. Rep from * around. 12 sc.
Lightly stuff the eye.
7th rnd: Sc2tog around. Fasten off.
Eyelid – Make 2
The eye balls will be inserted inside the eye lids once done.
1st rnd: With D, create magic ring. 6 sc in magic ring. Mark last st with st marker. Work in continuous rnds from here.
2nd rnd: 2 sc in each st around. 12 sc. Move stitch marker at the end of each rnd to the last st.
3rd rnd: *1 sc in next st, 2 sc in next st. Rep from * around. 18 sc.
4th and 5th rnds: 1 sc in each st around. 24 sc.
6th rnd: *1 sc in next st, sc2tog. Rep from * around. Fasten off. Leave long tail for sewing.
Assembly
Assemble the eyeball inside the eyelid. Secure the eyeball with a long tail from the eyelid around the rim of the eyelid.
Put the puppet onto your hand. The eyeballs will go at the Proximal Phalanges section of your hand. Between the knuckle and the first bend in the fingers. Mark with a stitch marker for best positioning.
Scrappy Ears – Make 2
1st rnd: With C, create magic ring. 6 sc in magic ring. Mark last st with st marker. Work in continuous rnds from here.
2nd rnd: 2 sc in each st around. 12 sc. Move stitch marker at the end of each rnd to the last st.
3rd rnd: *1 sc in next st, 2 sc in next st. Rep from * around. 18 sc.
4th rnd: *1 sc in next 2 sts, 2 sc in next st. Rep from * around. 24 sc.
5th rnd: *1 sc in next 3 sts, 2 sc in next st. Rep from * around. 30 sc.
6th and 10th rnds: 1 sc in each st around. 30 sc.
11th rnd: 1 sc in next 3 sts, sc2tog. Rep from * around. 24 sc.
12th rnd: 1 sc in each st around. 24 sc.
13th rnd: 1 sc in next 2 sts, sc2tog. Rep from * around. 18 sc.
14th rnd: 1 sc in each st around. 18 sc.
Rep 14th rnd until ear length measures 6” [15.25 cm]. Fasten off and leave long tail for sewing.
Flatten both ears and using one of the long strands from just one of the ears sew them together across the flat open section. It will resemble a barbell look.
Lay the joined piece over the head behind the ears. Centre it and then sew into position by using the following steps:
Start sewing directly on the joint seam from directly behind the eyes.
Once halfway across, fold over the ears up towards the eyes and flatten. Continue to sew. The ear indentation should start behind the eyes going outward to ensure the ears are always curved to listen to whomever the puppet is talking to.
Run the yarn through the back of the eyelids to hold the eyes back onto the ear folded area.
Both ears will droop down each side. Style the ears by pushing inward on the bulging section of each ear and twist forward.
Nibbles Ears – Make 2
With F, complete the scrappy ears from 1st to 14th rnds.
Rep last rnd until ears are 3.75” [9.5 cm] long.
Attach ears directly behind the eyes so they fan out towards the side. Secure the back of the eyes to the front face of the ears.
Secure the edge of the ear to body of puppet.
Inside Mouth – Make 2 Pieces
Both pieces are made and then joined. Then equally split between the top and lower mouth.
With H, create magic ring. 6 sc in magic ring. Mark last st with st marker. Work in continuous rnds from here.
2nd rnd: 2 sc in each st around.
3rd rnd: 1 sc in next st, 2 sc in next st. Turn.
4th row: Ch 1, 2 sc in each of the next 10 sts. Turn.
5th row: Ch 1, 1 sc in each st across. Turn.
6th row: RS. Ch 1 sc in each st across. Fasten off leaving in long tails for sewing.
Sew across the non-rounded section with the RS facing up.
Sew the join section at the natural fold of the throat of the puppet.
Keep sewing the inside the mouth on upper and lower to secure.

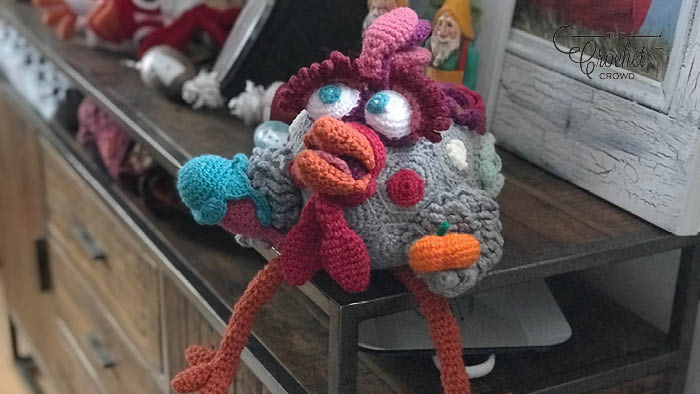
Scrappy is trying to get the Rooster to Speak but he’s giving scrappy the silent treatment. You can get the free pattern for the Round Rascals Rooster here. Mikey adlibbed the pumpkin and ice cream come as a fun add-on.


