
Mixing Crochet Borders
Have you ever got to a crochet border and found yourself rushing to finish that you put a very simple, almost really not a border at all on your afghan just to say you are finished? If the answer is YES, you are in my same life boat. I’m exactly that same way, and man, do I feel badly about that.
When you work on an entire afghan, by the time you get near the end, you just want to move onto something else. Your attention is already on your next project and you find yourself cutting corners in order to do it. I speak for myself, this is the difference an ‘Okay’ afghan to a ‘Fabulous’ afghan.
Have you ever noticed, afghans on Facebook tend to get more ‘Likes’ when the border compliments the afghan. For me, I don’t crochet so I can get more ‘Likes’ on Facebook or to impress people on Facebook. I crochet because I absolutely love this hobby and want to share my passion with others. With over 1 Million followers on our Facebook, I think the majority are participating in our network to showcase their work but would crochet regardless if Facebook existed or not.
I have made a Gallery below. All of those borders are designed by me. I have written instructions for each one. If you would like the free instructions, visit my Granny Square Border Page.
General Border Making
Borders on patterns can be a real let down, in some cases. The designer has exceeded expectation and put on a cheap border. I know, I’ve done this before due to rushing the creative process.
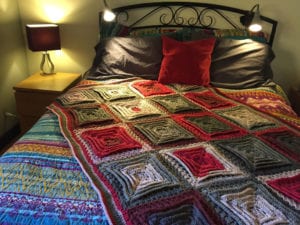
Recently, I designed the Hypnotic Tiles Afghan using Caron Cakes. Behind the scenes, I did the border 3 times before I could get it right for the 4th attempt. I did the entire border section completely and had to pull out the entire border each time. The first 3 attempts the border wasn’t sitting properly. Generally, based on overall feedback and what people complain about is when a border on a project doesn’t sit flat. In going across the sides, I kept adding too many stitches and by the time I got to finish, the border was ruffling and malformed.
At one point, I nearly gave up doing a border for this afghan at all. However, it needed it to stabilize the entire look. So as much as the 4th time I was pretty annoyed with myself, it had to be done.
The First Round
The first round is the most critical of a border, in my opinion. Getting the counts correct and stitches to sit properly. It’s like building a house, if the bottom layer of bricks isn’t sitting right, how do you expect the wall to go up straight?
For myself, if I see what I refer to as a ‘cheap border’ in the sense of creativity is really lacking. I exchange that part of the pattern with something else. I’ve been crocheting nearly 30 years. I know a lot of stitches. Why should the border be a simple single crochet, half double crochet or double crochet. There are 100’s of stitches in crochet. Certainly, in the years I have been crocheting, I can mix something I know.
How about criss cross, back loops, front posts, scallops, crocodile stitches, ribs, extended stitches, reverse single crochet, puff stitches, popcorn and so many other fabulous stitches.
The Corners
The corners are always the challenge. However, the good news is that there isn’t endless possibilities for corners. The corners have to make that 90 degree turn, one way or another. In special stitches, some designers have it worked out mixing crazy pattern concepts that are incredibly fabulous but very difficult to remember without referring to a pattern.
Generally speaking, corners need an even balance of stitches. Keeping in mind that single crochet, half double crochet, double crochet, and treble crochet each have different heights. It gets tricky if you are mixing these types of stitches together in the rounds.
I have some rules I prefer for myself for consistency. I thought I would share those with you.
Single Crochet
- 3 sc into the corner ch space.
- sc, ch 1, sc in to the corner.
- 3 sc into the corner stitch.
Half Double Crochet
- 2 hdc, ch 2, 2 hdc into corner ch space.
- 5 hdc into corner ch space.
- 5 hdc into corner stitch.
Double Crochet
- 3 dc, ch 2, 3 dc into corner ch space.
- 5 dc into corner ch space.
- 5 dc into corner stitch.
Treble Crochet
- 3 tr, ch 3, 3 tr into corner ch space.
- 7 tr into corner ch space.
- 7 tr into corner stitch.
In the examples above, here’s a the trick. Whenever you create a corner and create the chains that separate the stitches. You will always be creating a gap space on a corner. Look at the fuchsia area on the Double Crochet Granny Square Border Pattern picture. So if don’t want gaps in the corners to appear, you will put the number of stitches recommended into a corner stitch instead without any chains to separate them. This will close off the corner. For some people, this is important for babies to have no gaps in a blanket for the fingers or toes.

