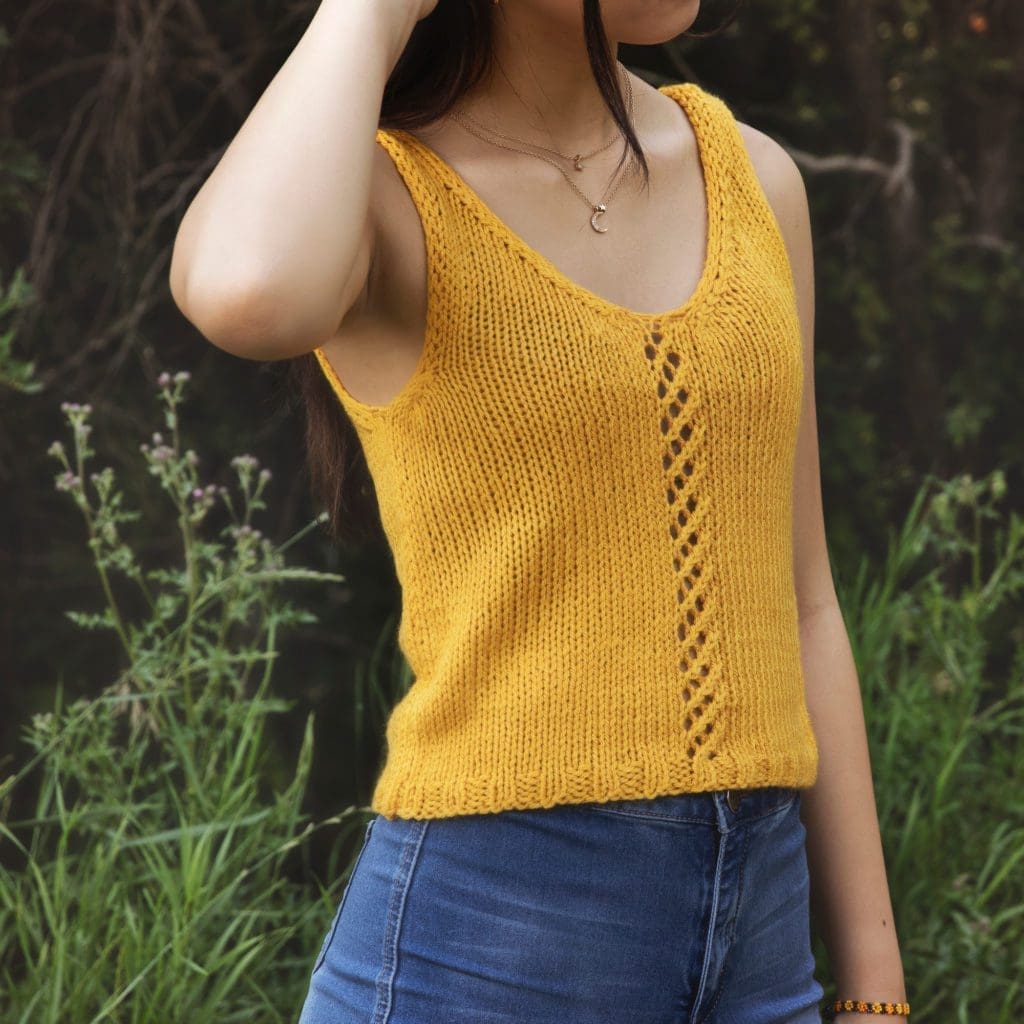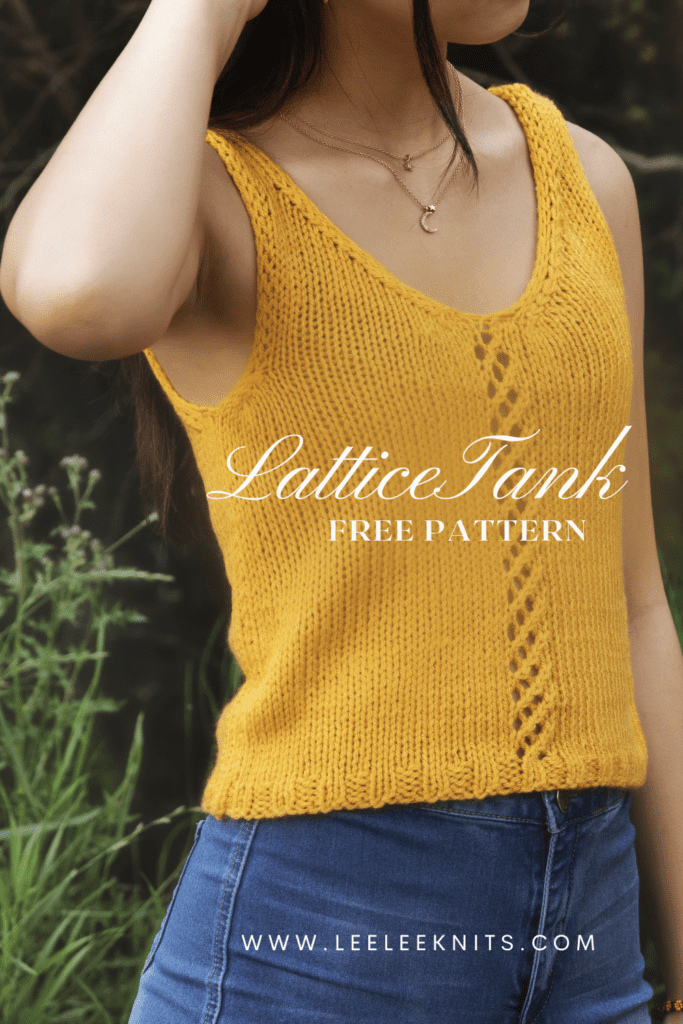
Hey everyone! I couldn’t let this summer pass without whipping up a knitting pattern for a tank top to share with you all. While brainstorming the design, I was going for something soft, breezy, and super comfy – you know, the perfect go-to for those scorching hot days.
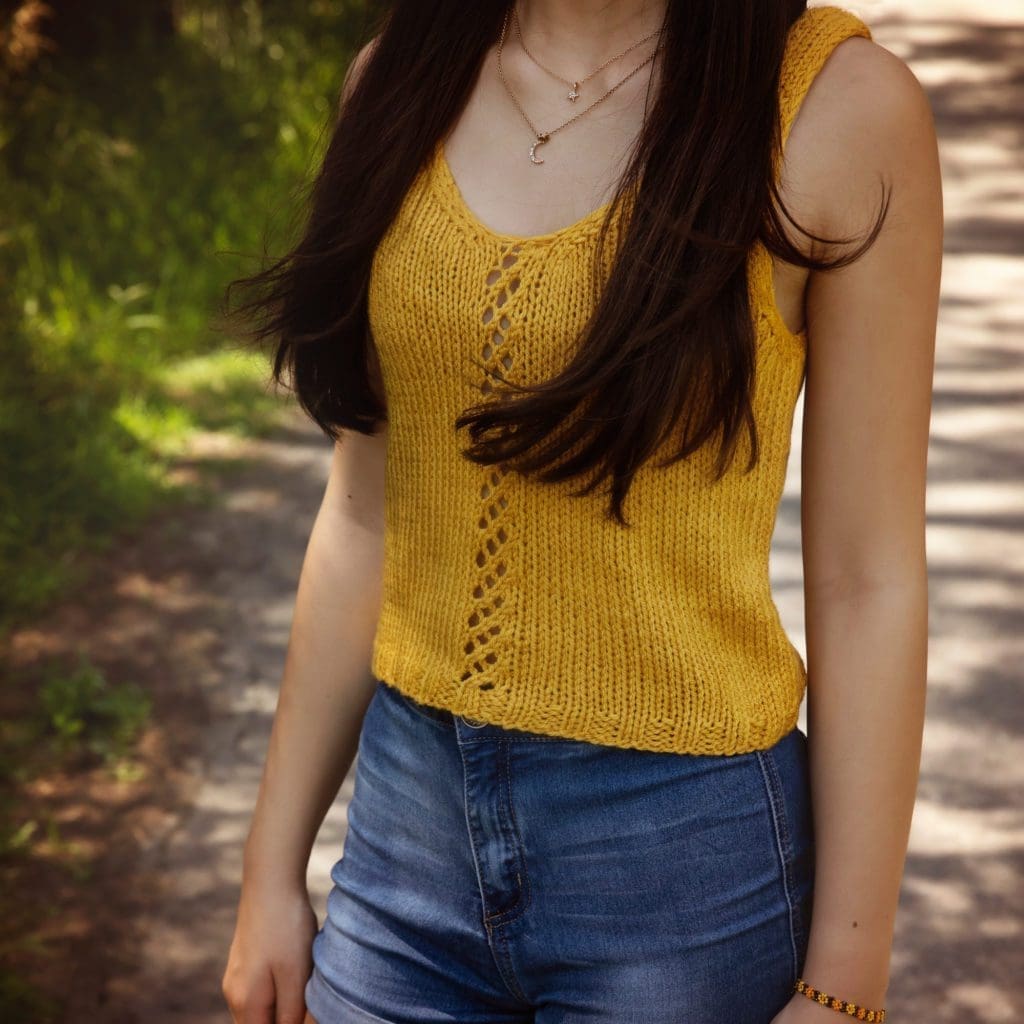
Lately, I’ve been obsessed with lace knitting, and I thought it’d be fun to add a touch of lace to this tank top. But, of course, I didn’t want to make things too complicated. So, after a few tries, I ended up with this cute scoop neck tank, and I incorporated a tiny lace panel that’s just four stitches wide right at the centre of the front.
The panel reminded me of a lattice, so I just had to call it the “Lattice Tank.” I’m so stoked to share this pattern with you, and I hope you enjoy knitting it up!
Pay it Forward!
I hope you enjoy this pattern! If so, please feel free to share the link to this page on your social media or Pinterest account.
I truly appreciate all of you who get the word out about this site and my patterns!
❤️
Alnaar
Yarn Choice
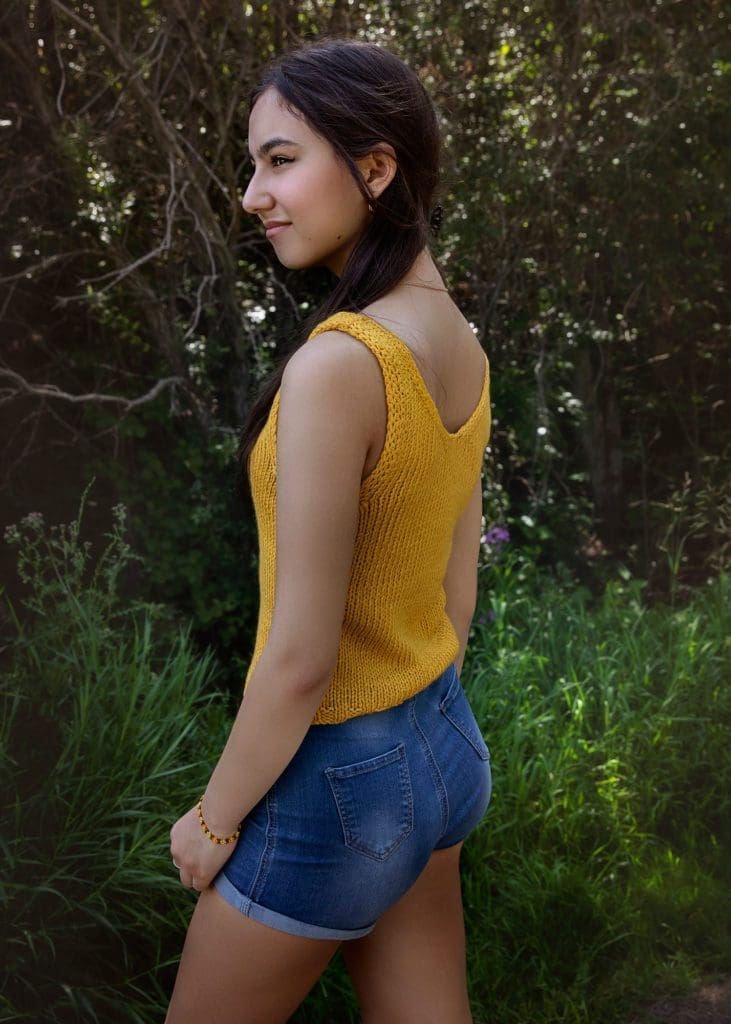
When creating this top, I had two absolute must-haves. First, I wanted it to be a quick and lightweight project, so I went with worsted weight yarn. Second, it had to be machine washable and durable enough to endure the entire season. That’s why I ended up choosing Paintbox Yarns Simply Aran, one of my go-to acrylic yarns. Plus, it’s budget-friendly, which is definitely a win! My daughter loves the colour yellow, and had agreed to be my model for the photos, so the obvious colour choice was Mustard Yellow. She was thrilled with the final result, and I’m confident she’ll get plenty of use out of her new tank top!
Ad Free PDF File
The free pattern for this knit tank top is available right here on this page, as this site is sustained through ad support.
If you like things a little more streamlined, I’ve put together an ad-free, downloadable PDF version of the pattern. It’s perfect for easy printing and can be can be purchased through My Ravelry Store or by clicking the “Purchase PDF File” button to the right.
Thank you so much for your support! It means the world to me, and I’m beyond grateful to be able to share my passion with you all.
Lattice Tank Top Knitting Pattern
Please note that some of the links on this page are affiliate links, which means that I will earn a commission if you purchase through these links. I use all of the products listed on this page and recommend them because they are companies that I have found helpful and trustworthy. Please let me know if you have any questions about anything I have recommended!
Materials:
You will need the following materials to make one top:
- Approximately 220(260, 320, 360, 420, 460) yards of Paintbox Yarns Simply Aran yarn in Mustard Yellow.
- Size 10 (6 mm) circular knitting needles (32″ cord).
- Scissors.
- 2 stitch markers.
- Stich holder
- Tapestry/yarn needle (for weaving in ends).
Gauge:
15 stitches, 19 rows = 4″ in stockinette stitch after blocking.
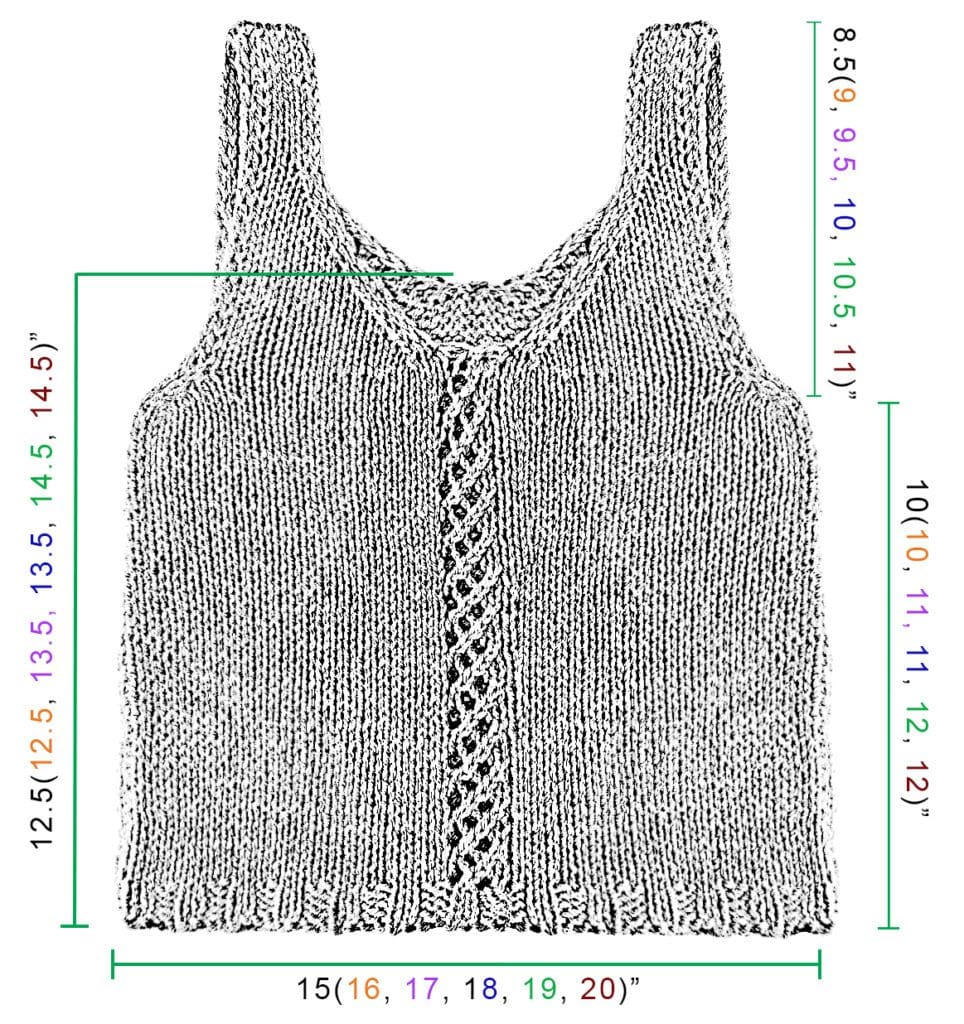
Measurements:
Abbreviations:
K: Knit.
P: Purl.
St: Stitch.
Yo: Yarn over needle.
Skpo: Slip one stitch knitwise, knit one stitch, pass the slipped stitch over.
Sk2po: Slip one stitch knitwise, knit two stitches together, pass the slipped stitch over.
K2Tog: Knit 2 stitches together.
K3tog: Knit 3 stitches together.
Pattern Notes:
- The top is knit flat in rows from the bottom up, using circular knitting needles to hold the large number of stitches.
- The Pattern is written for the following sizes: XS(S, M, L, XL, 2XL).
- Use stitch markers to mark the beginning and end of the lace panels.

More Free Knit Top Patterns from Leelee Knits!
Lattice Tank Top Free Knitting Pattern
Front Panel:
Cast on 52(56, 60, 64, 68, 72) stitches.
Knit 4 rows in 2X2 Rib Stitch and then repeat rows 1-4 until work measures 10(10, 11, 11, 12, 12) inches (end the last repeat on row 4). Continue to Underarm Shaping:
Row 1: K24(26, 28, 30, 32, 34) (k2tog, yo) twice, k24(26, 28, 30, 32, 34).
Row 2: Purl all sts.
Row 3: K24(26, 28, 30, 32, 34), k1, k2tog, yo, k1, k24(26, 28, 30, 32, 34).
Row 4: Purl all sts.
Underarm Shaping:
Row 1: K1, sl1p wyif, k1, sk2po, k18(20, 22, 24, 26, 28), (k2tog, yo) twice, k1, k18(20, 22, 24, 26, 28), k3tog, k1, sl1p wyif, k1. Count 48(52, 56, 60, 64, 68) sts.
Row 2: sl1p wyif, k1, sl1p wyif, p to last 3 sts, sl1p, k1, sl1p wyif.
Row 3: K1, sl1p wyif, k1, sk2po, k16(18, 20, 22, 24, 26), k1, k2tog, yo, k1, k16(18, 20, 22, 24, 26), k3tog, k1, sl1p wyif, k1. Count 44(48, 52, 56, 60, 64) sts.
Row 4: sl1p wyif, k1, sl1p, p to last 3 sts, sl1p wyif, k1, sl1p wyif.
Row 5: K1, sl1p wyif, k1, sk2po, k32(36, 40, 44, 48, 52), k3tog, k1, sl1p wyif, k1.
Count 40(44, 48, 52, 56, 60) sts.
Row 6: sl1p wyif, k1, sl1p, p to last 3 sts, sl1p wyif, k1, sl1p.
Continue to Neckline Shaping Right Side.
Neckline Shaping Right Side:
Row 1: K1, sl1p wyif, k13(15, 17, 19, 21, 23), k2tog, k1, sl1p wyif, place next st on stitch holder and hold at back, k1, place stitch back on left needle from holder. Leave the remaining 20(22, 24, 26, 28, 30) sts on needle or thread through a scrap piece of yarn to hold. Count 19(21, 23, 25, 27, 29) sts on right needle.
Row 2: sl1p wyif, k1, sl1p wyif, p to last 3 sts, sl1p wyif, k1, sl1p wyif.
Row 3: K1, sl1p wyif, k to last 5 sts, k2tog, k1, sl1p wyif, k1.
Row 4: sl1p wyif, k1, sl1p wyif, p to last 3 sts, sl1p wyif, k1, sl1p wyif.
Repeat rows 3 and 4 until 10 sts remain, and then repeat rows 1-2 below a total of nine times.
Row 1: K1, sl1p wyif, k to last 2 sts, sl1p wyif, k1.
Row 2: sl1p wyif, k1, sl1p wyif, p to last 3 sts, sl1p wyif, k1, sl1p wyif.
Cast off in pattern.
Continue to Neckline Shaping Left Side.
Neckline Shaping Left Side:
With the remaining 20(22, 24, 26, 28, 30) sts, begin on right side row.
Row 1: K1, sl1p wyif, k1, skpo, k to lat 2 sts, sl1p wyif, k1.
Row 2: sl1p wyif, k1, sl1p wyif, p to last 3 sts, sl1p wyif, k1, sl1p wyif.
Repeat above two rows until 10 sts remain, and then complete rows 1-2 below a total of nine times.
Row 1: K1, sl1p wyif, k to last 2 sts, sl1p wyif, k1.
Row 2: sl1p wyif, k1, sl1p wyif, p to last 3 sts, sl1p wyif, k1, sl1p wyif.
Cast off in pattern.
The front panel is complete, continue to Back Panel.
Back Panel:
Cast on 52(56, 60, 64, 68, 72) stitches.
Knit 4 rows in 2X2 Rib Stitch and then knit in stockinette stitch until work measures 10(10, 11, 11, 12, 12)”. Continue to Underarm Shaping.
Underarm Shaping:
Row 1: K1, sl1p, k1, sk2po, k40(44, 48, 52, 56, 60), k3tog, k1, sl1p, k1. Count 40(44, 48, 52, 56, 60) sts.
Row 2: sl1p, k1, sl1p, p to last 3 sts, sl1p, k1, sl1p.
Row 3: K1, sl1p, k1, sk2po, k36(40, 44, 48, 52, 56), k3tog, k1, sl1p, k1. Count 36(40, 44, 48, 52, 56) sts.
Row 4: sl1p, k1, sl1p, p to last 3 sts, sl1p, k1, sl1p.
Row 5: K1, sl1p, k1, sk2po, k32(36, 40, 44, 48, 52), k3tog, k1, sl1p, k1. Count 32(36, 40, 44, 48, 52) sts.
Row 6: sl1p, k1, sl1p, p to last 3 sts, sl1p, k1, sl1p.
Complete rows 1-2 below twice and then continue to Back Shaping Right Side.
Row 1: K1, sl1p, k to last 2 sts, sl1p, k1.
Row 2: sl1p, k1, sl1p, p to last 3 sts, sl1p, k1, sl1p.
Back Shaping Right Side:
Row 1: K1, sl1p wyif, k13(15, 17, 19, 21, 23), k2tog, k1, sl1p wyif, place next st on stitch holder and hold at back, k1, place stitch back on left needle from holder. Leave the remaining 20(22, 24, 26, 28, 30) sts on needle or thread through a scrap piece of yarn to hold. Count 19(21, 23, 25, 27, 29) sts on right needle.
Row 2: sl1p wyif, k1, sl1p wyif, p to last 3 sts, sl1p wyif, k1, sl1p wyif.
Row 3: K1, sl1p wyif, k to last 5 sts, k2tog, k1, sl1p wyif, k1.
Row 4: sl1p wyif, k1, sl1p wyif, p to last 3 sts, sl1p wyif, k1, sl1p wyif.
Repeat rows 3 and 4 until 10 sts remain, and then repeat rows 1-2 below a total of seven times.
Row 1: K1, sl1p wyif, k to last 2 sts, sl1p wyif, k1.
Row 2: sl1p wyif, k1, sl1p wyif, p to last 3 sts, sl1p wyif, k1, sl1p wyif.
Cast off in pattern.
Continue to Back Shaping Left Side.
Back Shaping Left Side:
With the remaining 20(22, 24, 26, 28, 30) sts, begin on right side row.
Row 1: K1, sl1p wyif, k1, skpo, k to lat 2 sts, sl1p wyif, k1.
Row 2: sl1p wyif, k1, sl1p wyif, p to last 3 sts, sl1p wyif, k1, sl1p wyif.
Repeat above two rows until 10 sts remain, and then complete rows 1-2 below a total of seven times.
Row 1: K1, sl1p wyif, k to last 2 sts, sl1p wyif, k1.
Row 2: sl1p wyif, k1, sl1p wyif, p to last 3 sts, sl1p wyif, k1, sl1p wyif.
Cast off in pattern.
Continue to Finishing.
Finishing:
Sew front and back panels together at the side seams (mattress stitch) and tops of shoulders (whip stitch).
Weave in all loose ends and then wet or steam block to measurements and enjoy your new Lattice Tank Top!
Pattern PDF File
I hope you enjoyed this free knit tank top pattern.
If you’d like your own copy, the Ad-Free PDF file (which will be emailed to you automatically) can be purchased through Ravelry, or by clicking the “Purchase PDF File” button to the right.
Thank you so much for your support! It means the world to me, and I’m beyond grateful to be able to share my passion with you all.
