According to the survey, there are relatively fewer people who can use crochet techniques well than stick knitting. Therefore, crochet teaching starts from the most basic and focuses on simplicity. Crochet symbols and knitting techniques are gradually learned from shallow to deep as they are used in the works. . In order to let everyone have interest and fun in learning, try to make simple crochet knitting into new clothes as much as possible in teaching. I hope that everyone can upload pictures to talk about their feelings and communicate with each other while completing the work, so that I can grasp the teaching content and progress.
Crochet knitting is a combination of stitches such as lock stitches, short stitches, and long stitches to form a pattern connection to complete a work. There are five basic crochet stitches:
1: Knitting symbols and diagrams
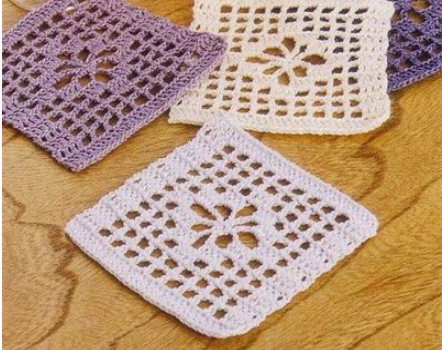
1. Locking stitch : Hang the thread on the needle, pull the thread from the sleeve to complete the locking stitch, the first stitch is not counted as the number of stitches, and repeat the previous actions to form a series of locking stitches, which are often used for knitting Starting stitches and standing stitches.
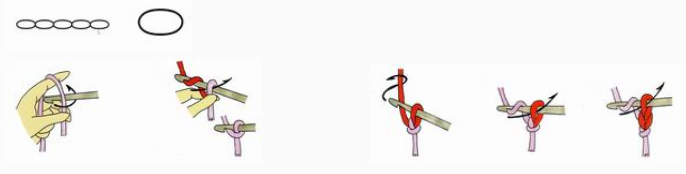
2. Short stitch : insert the needle through the knitting needle in the previous row, hang the thread and bring it out, then hang the thread on the needle, and hook out from the two sleeves on the needle to complete the short stitch. The standing stitch is a lock stitch.
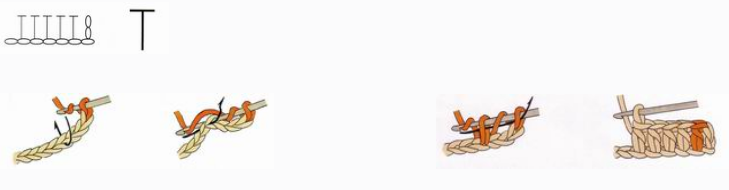
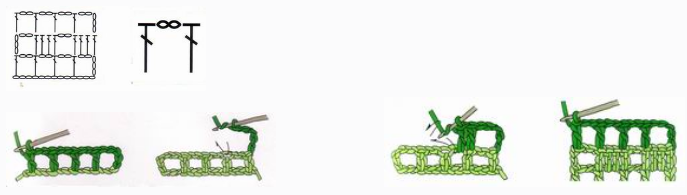
4. Long needle: The starting procedure is the same as that of the medium and long needle. There are three sleeves on the needle. Bring the hanging thread on the needle out of the two sleeves, take the thread again, and hook it together from the two sleeves left on the needle to complete. , the rising stitch is a three-needle lock stitch.
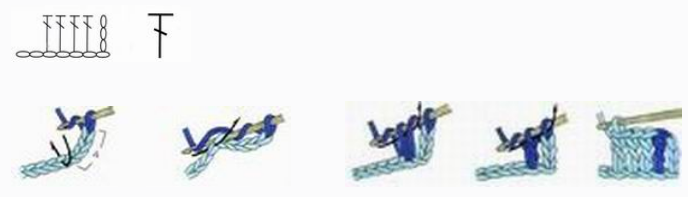
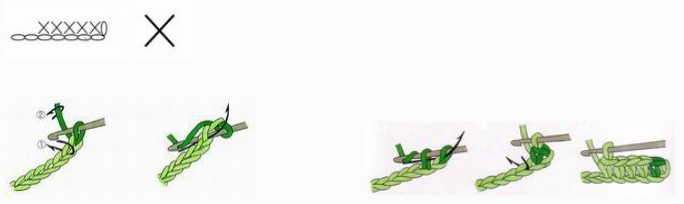
5. Pulling out the needle : insert the needle through the knitting needle and hang the thread in one go according to the arrow to complete.
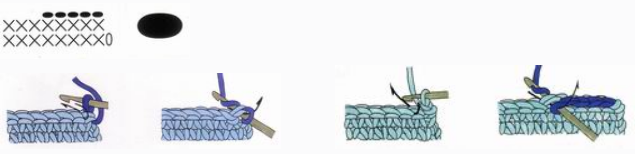
In order to make the work—the dual-purpose vest can be knitted smoothly, prepare for it. Use leftover thread to crochet square coasters, depending on the material and size . Learn to use crochet symbols and knitting methods and techniques in knitting.
Size: a square with a side length of 9 cm
Tool: Crochet No. 2/0 thick 2.0mm
Material: hard cotton thread
Square Coaster Crochet Symbols Diagram
How to make coasters :
1. Start: lock stitch starts with 34 stitches, one of the commonly used starting methods : lock stitch start method: repeat the same action of lock stitch to complete the start of 34 stitch lock stitch knitting.
2.
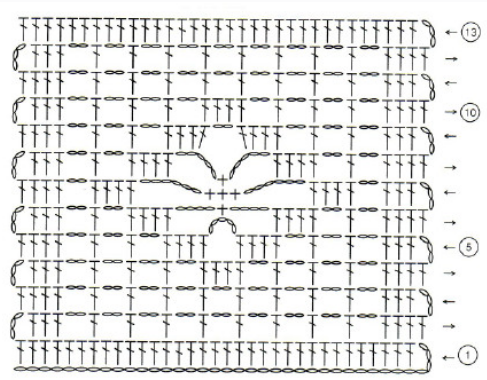
4. Grid weaving in the second row: grid weaving is often used in crochet lace weaving. This crochet method seems simple, but it is not easy to hook a large area neatly.
Square weaving symbols and diagrams 6. Square weaving
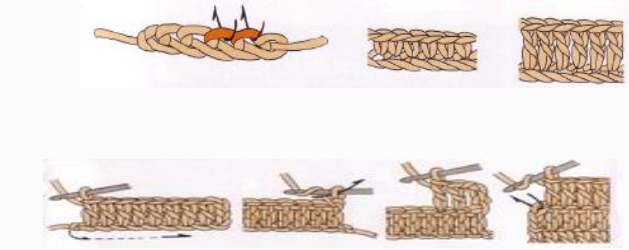
6. The difference between the front and back of the crochet fabric:
when crocheting, each row is carried out from right to left, the standing needle is on the right side as the front side, and the left side is the reverse side, and the standing needle determines the front and back side of the crochet fabric.

